 It's been a while since I managed to get any significant time on the car due to a combination of illness, holidays and Christmas. At the start of December I decided it was time to drop the car off the stands before it all got too heavy - this is where I encountered a slight problem! Once the nice shiny wheels (which I have managed to pick up off ebay) were on, the rear wheels would lock; odd I thought so I removed the handbrake, tightened the wheels up and once again everything was jammed up. The same would happen with the brake shoes out (drums on - old or new!) so I put it down to a warped drum back plate. After hours spent on the Internet, I found out I should have used a series of spacers, another thing that would have been apparent had GBS put together a manual or full list of parts on the website. Skip through December whilst I waited for the parts, went on holiday and enjoyed Christmas before getting a cold!
My first free weekend of January I got round to fitting the spacers; once tightened up and the rear brakes rebuilt, I could see the results and funnily enough the rear wheels were able to move as I had expected back at the start of December. After this I had to get on with a dull job, tidying the garage.
The second weekend of January I was lucky to have a helpful hand (Jordan) for the whole of Saturday. With the engine planned to go in on 4th February, I had to finish of all of the little jobs that would be best done without a Pinto in the way. I thought the list was ambitious to complete that day but was pleasantly surprised to find that everything got completed:
- Repair engine crane
- Widen steering track rods as my wheels weren't quite right.
- Reconnect NSF top ball joint as the nut hadn't gone on very well originally.
- Shorten steering shaft connector bolt
- Reconnect handbrake following pre-Christmas issues
- Connect the propshaft
- Finish attaching up the loom in the engine bay
- Attach sump
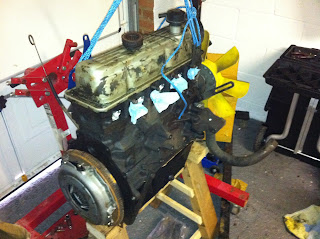
- Take engine off the the stand ready for new clutch & flywheel
- Attach clutch & flywheel
Part way through the day once all the 'clean' jobs were done I took the opportunity to get some 'rolling chassis' pictures.
On Sunday I finished off the clutch job by replacing clutch bearing in the bellhousing on the gearbox, messy job but one I was recommended to complete. Again no issues with this and the gearbox is one step closer to being attached!


