Sunday 9 September 2012

The Zero lives

Since my last post in July I haven't been ignoring the car and enjoying the British summer, no, I've been trying to get the engine to start! This has been a long, testing period of the build but I can finally announce some positive news - it starts!! There have been a few issues along the way which I will hope to address now.

Fuel Pump
The first weekend I tried to start the engine failed before it really got going! Mike & I started by removing the rocker cover to investigate the valve placement at camshaft TDC; all looked good but we suspected there was a misalignment with the crank. Didn't think it was too bad and not bad enough to get the engine started. So, chug chug chug with the starter and nothing...............not even a drop of fuel in the filters. The starter turned, the engine turned but there was a fuel issue. The engine was originally an injection model, I've stuck it to carbs with a mechanical fuel pump - the trouble here was that I didn't have the small push rod that is required to pump the pump.

Thanks to a very helpful Locost member who sourced the part and sent it to me. Fitted, problem solved but still no fire!

Electrical
I stuck a post up on Rhocar asking for a bit of advice, I was fortunate enough to have Alan_builder living very close by. He came over and we worked through the ignition electrics to determine that there was a spark and enough power to, in theory, get it started. After fixing a loose connection on the dizzy, setting the timing on the crank and dizzy we then tried the engine - still nothing. A few more tests on the leads and plugs, we were in agreement that the spark plugs were rubbish.

A few days later, I had new plugs and was able to create a better spark. However still no luck on the engine!!

Weber 32/36 DGV Carb
Wtih a second visit by Alan and a useful post on Rhocar by Longboarder, we determined that my carb was also causing issues. My carb had an anti-dieseling valve which wasn't connected up to the live, however once connected we discovered that it was damaged beyond repair. The purpose of this part is to stop fuel getting into the engine if the power is cut, sounds an ideal part however mine was broke!! £45 for a replacement, bit steep so I bought a second hand Weber 32/36 DGAV and this seems to be OK.

Timing
As mentioned above, there was a suspicion of a timing issue between the crank and cam, this was true and as all other avenues had been explored I thought I should follow up on this. Crank turned to TDC, timing belt slackened, cam turned the shortest possible direction to line up with TDC and dizzy lined up. I tightened up the belt tensioner, checked the dizzy (about 8 deg before TDC), turned the engine to check it stayed lined up and then took the plunge - it started!!!!!!!

Now, the engine starting was a huge milestone, it was the first time I had ever heard it running and coincided with the 1st anniversary (give or take a few days) since I collected the kit from GBS. However it did highlight a few issues that need to be resolved before I can run the engine for a longer period:

Smoke on Engine Block
There was a small amount of smoke coming from near the top of the exhaust manifold, not apparent in the video but visible to me stood next to it!! Will investigate this but not a urgent issue.

Oil Pressure Light
This didn't switch off as expected, not sure if this was due to the leak I later found or if there is a fault with the old Ford switch or my wiring. Stupidly I forgot to look at the oil pressure gauge I had paid good money to show up if there is an oil pressure issue!! One for the future.

Oil Leak
Looks like there is a leak coming from the rocker cover, I might have not tightened the bolts properly so I will follow up on this. It was a new gasket so might need bedding in. One to think about.

Doesn't switch off!
The biggest issue that I found after starting the engine - it doesn't switch off!! I have a feeling there might be a wiring issue linked to the alternator that keeps the ignition coil live despite the key being switched off and even taken out of the car. I had to stop the engine by removing the ht leads. This is a very odd issue but one that will be solved by understanding the entire wiring loom - hopefully! Think I might give GBS a ring on this one before I mess around too much.

Sunday 8 July 2012

Electrics - not as easy as I thought!

Over the past month I have been busy fighting with the electrics, having bought the plug & play loom I was naive enough to think it would all go easily - how wrong was I?! The last post showed the dash in but I had no battery so I couldn't test it.

The battery arrived pretty quickly and I couldn't hold back the excitement, plugged it in and then came the list of 'dash issues':
  1. My hazard switch would flash the whole time, regardless of ignition, hazards etc!
  2. No light to the 3 smaller gauges
  3. Only 2 out 6 indicators worked
  4. Savage hazard switch didn't do anything (i.e. operate the indicators)
  5. Warning light indicators flashed the wrong way
  6. Fan didn't work
The indicator issues were a combination of my fault (leds) and just the general design of the wing top indicators. The leds just needed the wires switching, solved! The wing tops needed removing, the spring on the bulb had to be moved to a different location in the set up, trouble is to get to these I needed to remove the whole front wing. This meant the job would take an age - it did.

With the smaller gauges I just needed to earth the lights instead of looping back to live, makes sense when actually thinking about it.

The indicator warning lights are on a 6 led cluster, here I also noticed that a few of the colours on the other symbols were odd. Turns out I had installed it upside down, simple fix I guess.

The fan not working was again a simple fix once I got the answer from GBS. I needed to ground a connection on the 'Engine Plug'. Unfortunately this part had no instructions, just a group of 12 wires on a plug. Fortunately I managed to get hold of a pdf list of the connections, made life so much easier.
The hazard issue was going to be much more serious and complex so I enlisted the help of the Rhocar forum. After the suggestion of a few ideas from the forum, the working result is this (numbers refer to GBS Plug & Play loom):
Essentially, joined 4 & 8 together, 5 to both savage 2 terminals, 6 & 7 to both savage 1 terminals, link one of the 1s to the LED + and LED - to ground. Stick a diode on whichever indicator connection you use for the link to the LED, the idea being you don't want the led to flash when just indicating left (or right).
Much more complex than my original wiring diagram!

Here are a few pictures of the car all lit up:


Following all the dash related work, I then moved onto the engine bay wiring, as mentioned above I purchased the GBS engine plug so it should have been a case of connecting everything up with a few spades. First job, oil pressure gauge & warning light - then realised I was a sender down. My solution to the single pinto hole and the two gauges was to purchase an LMA T piece to hold the 1/4" pinto oil pressure switch and the 1/8" Smiths oil pressure sender. Other connections went in OK and seemed pretty straight forward. Still only got the alternator to wire up and the warning light for this may need a resistor, we'll see in the next week or so I guess. Once I've done this I'll post up my connections, it's a Nippon Denso and I know these can have odd connections!

The plan for the coming month is to start the engine. Really can't wait for this but must make sure the car is ready first, wouldn't want all my hard work to be ruined by something not quite connected right and ending up causing some damage!


Wednesday 6 June 2012

Dash is fitted!

Taking full advantage of the bank holiday weekend I managed to finish fitting the dash. I only had about ten wires to crimp and then needed to bolt it all up to the car. All in all this took a couple of hours as the centre consol needed slightly realigning. I'm really pleased with how it all looks, can't wait to connect up my battery to test it. After thinking about how to test it all I realised I would need to remove the dash just to get to the fuse box to connect up the battery wires, d'oh!!
Once this was finished I decided to tidy up both the front and rear light wiring. No pictures of this but just a focus on how I want the build to look clean & tidy. Going on the hope that a good looking car with give the IVA man some confidence in the build!

Following this I refocused back to the engine bay, starting with an adjustable fan switch. I've taken the probe in through a join in the hoses rather than the top of the radiator. This position sits just above one of the chassis supports so is an ideal location of the switch.
Once again I tackled the alternator, in the last few weeks I've purchased a Westfield pinto alternator mount, this is perfect for the job! Holds the alternator just off the engine and aligns the pulley nicely with the engine. All I need now is the add some steel to the standard alternator arm as this doesn't quite reach over the alternator. With this in (finally), I fitted the exhaust manifold. All I need now is a new 10mm drill piece so that I can firmly fit the exhaust can. Having this fitted it really gives the car a more complete look (except the missing seats, bonnet and nose!!).

Wednesday 30 May 2012

Rear Wings & Dash (part 3)

I decided to take a couple of days off work following my birthday as I was eager to fit the new parts I had so gratefully acquired! Before I could crack on I needed to turn the car around, the junk I have in the garage meant it was easier to work at the front of the car - not really that useful when I have rear wings to fit. So the car had it's first outing on the open road, admittedly pushed by my brother & I. Stupidly I didn't take any photos of this, they would have made really good pictures given the sun was out and the road was clear.

Rear Wings
I had a relaxed start on Monday morning and decided to tackle the rear wings first, from reading other blogs I was aware that I needed to remember to add in the rubber tubing (same stuff as on the rear panel) between the wing and the side of the car. With this in mind I pulled out the tubing and hung it off the back of the car so I wouldn’t forget. I've also seen that most people use rivnuts to secure the wings, I can't stand these so had decided to use M8x20 Allen head bolts, large flat washers and some nylocs. I had the nut heads on the inside of the car, will probably be covered with carpet but will give flat(ish) look.

The overall prep and fitting was pretty easy, the wings are what they are and shouldn't be that difficult to fit. When the car is fully built I will add a small amount of Sikeflex just to give that added strength.

I then focused on the rear lights; I had chosen a nice set of LED lights that sit in elevated round pods. The difficulty I had here was ensuring that the lights were the same height, straight and level on both sides!  The lights are universal and as such I had to make up a bracket to get them attached to the car, the advantage of this meant that I could also design it in such a way to minimise the drilling required in the actual wing. For security and piece of mind the rivets are mounted through a 1.5mm piece of steel, then through the wing and onto a thick steel bracket attached the light. I have 2 long reach 3mm rivets and 1 standard 4mm rivet per light. The fog and reverse lights are held on with 2 M6x15 bolts, secured in the bespoke brackets and secured between the rear panel and the fuel tank. Note to all other builds, think about lights before you fit the rear panel as its a tight squeeze!


The lights took longer than I had planned, well into Tuesday however I'm mega chuffed with how the lights are looking, just need a battery now so I can start to test things.

Dash - wiring up
Having received the final switches I needed to complete the dash I set about completing the wiring, everything was precut all I needed to do was add a bit of solder to a couple of connections. Once done I placed the dash in the car, having built my own loom I need to attach this to the standard GBS plug. So in true Formula 1 style I was sat in the car with my laptop place on the scuttle with my wiring diagram on show. I needed this to show my which GBS colour matched with each plug I had created. About 5 wires from the end the laptop died and I called it a day as it was getting late (Tuesday evening). Will revisit this next weekend and plan to test in a few weeks once I have the battery installed (and bought!)


Most of the wiring in the car is now complete except for the small engine loom, I still need to purchase this from GBS as they didn't have any at Stoneleigh.

Might have to focus my attention back to the engine soon, alternator still to fit and I now have a fan temp switch to fit.

Sunday 13 May 2012

Dash part 2 & Stoneleigh

I've been continuing with the wiring on the dash, pleased to say that it is all complete - except where I haven't received the final switches yet! I even had a chance to discuss the wiring plan with Simon (GBS) whilst at Stoneleigh; fortunately the plan seems it will work (in theory). So with the dash more or less complete, I felt it was time to have a trial fit; however before doing so, I decided to turn the rear dash support panel around so the rivets were on the inside (or to put it better - hidden).
Hopefully I will have a chance to add a photo of the final wiring as I'm quite pleased with it, it's also looking a lot tidier than shown in my previous post! I've tried to show the overall wiring plan, if it works I'll leave this post as it is, if I have issues then you may see this post disappear! The only change from this plan is a live feed to the security key switch.

8th July: The hazards didn't work, here is the solution: http://www.rhocar.org/index.php?showtopic=34078

Next jobs on the list included finally fitting the alternator and finishing the coolant pipes. The alternator has given me a few issues so far, the Sierra unit is too big, as is the standard mount as it fouls the steering shaft. So I now have a smaller alloy Capri mount but the alternator is still too close to the steering shaft. I'm going to try again next weekend, if no luck then I will raise the mount with a steel plate. With the coolant, I've got a GBS standard radiator with an overflow outlet, I also have a fancy header tank; however before I go all over the top with the cooling, I'm just going to fit an expansion tank. Once the car is running, I'll have a true feel of the cooling requirements.

I guess at some point I should think about turning the engine so I can fit the Bestek dizzy with the timing as close as possible to perfect, or maybe just OK?!

After these jobs have been looked at, I will be moving onto the rear wings, hopefully this should just be a weekend job and will include fitting the rear lights. Once this is complete, the car will be really taking shape. I'm still hoping to drive it for some part of this summer.

Stoneleigh
I was fortunate enough to be given tickets for Christmas so, as the May bank holiday arrived, I shot off up to Warwick for a day out in the sun. It was the first show I'd attended as a builder and it was a completely different experience as just an enthusiast - better I must add!

My trip to Stoneleigh was filled with various objectives, I had parts to collect, questions to ask and cars to 'borrow' ideas from. It was much the same for Mike (albeit a different car), he had my other ticket. I picked up my new exhaust manifold, exhaust fittings, carpet and battery cables and loaded up the car. Lots of parts to keep me busy over the next few weeks. I also managed to speak to Simon regarding the IVA, few hints & tips obtained - the most important is that the diffuser is not IVA compliant anymore! As mentioned above, Simon gave me some advice and set a few things straight on my wiring. I hadn't got anything wrong but had made some assumptions which he confirmed as correct. It was good to see the GBS stand so busy, possibly one of the bigger stands at the show. I picked up a few parts as above and got some ideas from the cars on show at both GBS and the RHOCar pitch. All in all, a very successful day and I'm pleased with the progress I've made since picking up the chassis in September.

Wednesday 2 May 2012

Dash - part 1

I'm at the stage where I needed to start on the dash. I felt that this needed to be exactly how I wanted it so I was expecting it to take some time. Part of the beauty of the self builds is the fact that each car is unique to the builder - to best demonstrate this, I have confess that I've been planning this part of the build since pretty much the beginning of the build! So, after months I have finally decided on the setup:

- Smiths Telemetrix gauges (3 small and 2 large)
- Savage style switches & Starter button
- LED warning light cluster

With all this decided upon, I then needed to sort out placements. Before getting to the final design, I think I had gone though 4 others! But once I'd sat with the dash in front of the tv for a whole evening without even touching it, I felt I had hit the perfect design. After cutting, this is how it looked:


There will be 2 additional holes cut once the switches arrive (birthday hint!).

So with the dash cut I then needed to think about the actual wiring. After spending a couple hours on Visio, I've designed the ultimate wiring plan, I'll upload it here once it's been tested and proven to work. Wiring plan sorted, I set about fixing in gauges:


Here is a picture of the rear with some of the initial wiring. So far all the gauges have been wired in.


I will follow up this blog entry with the finished dash in a few weeks, but first, off to Stoneleigh!! First kit show as an actual builder, can't wait! Aims of Stoneleigh, coolant routing ideas and general part shopping.

Tuesday 10 April 2012

Feels like progress!

It's been far too long since I last updated the blog despite spending most weekends out in the garage with the car. To be honest, I was hitting the point where I was unable to focus, I should have walked away from the car in order to stop myself just faffing without any real achievement! However, I snapped back into the right frame of mind and drew together a jobs list for the Easter weekend; the results are detailed in this blog. A tip for any other builds, the moment you start faffing or lose the will, walk away for a short period of time and you'll find that you'll return with much more desire to continue with the build!

Cooling
After much debate with myself, I decided to go with blue silicone hoses for the cooling system. The other option was black rubber hoses but the wonders of Auto Silicone Hoses and eBay meant I was able to afford the more stylish blue hoses!

I'm going with an M14 inline water temperature fan switch on the return hose to the radiator. The switch is yet to be fitted however the wiring has now been sorted, I've split the feed on the GBS loom at a point near to this switch. This means just an extra 8 inches of wire, resulting in a nice tidy solution.


The bottom hose is currently fitted with an alloy t-piece - the idea here is that I will fit a neat header tank but the plumbing seems a little over the top and complicated! Going to look at a few cars at Stoneleigh  in a couple of weeks for some inspiration or solutions.


Fuel Pipes
Having run the plastic fuel pipes right up to the engine bay, I thought it was time to fit the final fitments to the pump, pressure regulator and carb. I'm really pleased with how this has turned out, need to secure the pipes a little bit more but overall it looks good (well I think so!). I have a total of 3 fuel filters in place, might add some more but 3 will do for the moment.


Horn & Fan
A few minor electronics here. First the horn needed bolting down, I also added some foam to the underside to reduce the vibrations. I've heard that horns have a habit of falling off with the various vibrations coming from the engine bay so I think the foam may have been a vital addition!

Second set of electrics, I connected up the fan. Yes, this is split at the inline fan switch but all now connected up at the fan end. Few cable ties and everything is secure.

Wings
As hinted at the start, I've been looking for something that would make me feel like I had made real progress. I highlighted the front wings as something that may bring back the build 'spark'. I decided the wings didn't give a comfortable clearance from the brackets or the tyres therefore I made some new brackets; these also gave me a flat edge to rest the wings on.

The wings will be secured using two M6 allen bolts, some people use adhesive whereas others don't mind the odd bolt on show. I guess I'm in the second camp there. Fitting the wings was definitely the right thing to get me back in the 'build' move, just want to get the whole the whole thing finished now!!!


Front Lights & Indicators
The wings wouldn't be complete without the indicators, so just before Easter I planned how I was going to fit these and started drilling. Most people go for the the side LED indicators and front indicators on the nose (usually swapped after the IVA). I've gone for the usual sides and then wing top indicators as shown on the Raw Striker demo car. In terms of wiring and ducting, I have decided to duct out of the side of the wing along the top wishbone, with this being central I have no issues when the wheels are at full lock. The ducting has been secured to some cable tie mounts held down with Sikaflex and then cable tied to the wishbones, looks pretty neat and both sides are consistent!

Next came the fitment of the headlights. I purchased the sidelight loom from GBS, this made the job really easy! The only issue I had was that one of the headlights wobbled in the casing, this has been resolved with some foam strip around the edge, not ideal but I think it should do.

So with the headlights, indicators and wings fitted I took at step back and smiled, amazing progress!! The picture below doesn't really give it all justice but provides some of the detail.
Dash
As the scuttle was in place and I had taken delivery of my gauges (Smiths Telemetrix), I decided to mock up another dash idea, this time in the car!
One major change from the above, I'm ditching one of the smaller gauges (Oil temp) in favour of just having fuel level, water temp and oil pressure. The warning light cluster will go under the larger gauges (speedo & tacho). I might even drill the holes straight!

So, since last month I've made good progress but it's been a long time coming and a bit of a struggle. A quick thank you to Mike and Jordan over the last couple of weeks who have helped with ideas (or focus) and a few of the tasks.


Friday 2 March 2012

Scuttle & Engine Bay

I left the last blog entry considering whether the Sierra alternator would fit, fair to say that there was not a hope in hell! I have since purchased a nice 40amp Nippon Denso which is tiny. Other ancillaries have gone in better, the bestek ignition and weber carb are in. The viscous fan has also been removed to provide a bit more room of hoses and airflow.
Once the ancillaries had been progressed as much as possible I focussed on the radiator & fan, both went in quite easily. The ideal would have been to have the fan suck air through the radiator but due to the chassis supports this would not be possible.
Following this I thought I'd make a start on the scuttle, I was only going to prep the panels but quite soon I had the battery tray riveted in and the scuttle clamped up!
Once clamped into place I decided I might as well fix up with some self tappers so that it would hold its shape a like more consistently. The following weekend these got replaced with rivets. The GBS GRP dash fits but will need a trim around the steering column however the finished scuttle looks like this:
I have plenty more to complete in the engine bay which I hope to do over the next few weeks, once all done then I'll be fitting the nose and the car should really take shape. As a sneak preview (and to hide everything not complete under the bonnet) here is a pic;

Saturday 11 February 2012

Engine Time

Since the last post, much has changed with the kit build - the engine is in!!! Not jumping ahead too much as there were a few jobs that needed doing before this could 'just' happen. First job was to connect up the gearbox to the engine so it was more or less ready to drop; once the two had been pushed together, this was quite a simple task and when finished looked quite impressive! 
I've also connected up the fuel filler pipe and the registration plate bulb. In addition to this I also changed the rear brake piping, think this might be the 3rd time but I'm finally happy with this! Makes the rear end look so much better.


Other little jobs like giving the engine a clean, removing the old oil filter and fitting the gearbox mount needed to be completed before the engine could go in. I had opted not to purchase the GBS gearbox mount as I had a perfectly good one from the Sierra; the prep of the mount had a slow start but once I cracked how to remove one the old Sierra rivets it was fine.
So all jobs done it was time to start on the lifting and positioning. I was lucky enough to have Mike round to help me with this task - not something that could have been done by 1 person! So on Saturday 4th February we started around 9.30am and by 11am, the engine was lowered in but the gearbox wasn't fitting properly. Again this is another stage in the build where some guidance (or a manual) would be useful from GBS. The issue we had was that the starter motor casing was pressing against the side of the chassis, so after a coffee and then the realisation that we had crushed the steering shaft (oops!) we opted to phone GBS; 30 seconds later I had my answer. Screaming in frustration it's clear - GBS we need a manual!!!!!!!!!
So, engine out, gearbox detached and angle grinder plugged in. I took a corner off the gearbox, unfortunately I forgot to take a photo to help any other builders who may read this. The photo below hopefully shows the general idea!
Once the gearbox had been cut, we reconnected it back up to the engine and lowered it all back into the car. So much easier when doing it for a second time!! This picture shows the engine supported by the engine mounts and the gearbox loosely attached to the gearbox mount. The crane is still in position as I would need to lift it slightly when fitting the engine mounts properly as we had run out of time.
This is how the engine sat until today (11th February) when I found the time to bolt it in properly. I also fitted my new steering shaft, this one is straight and can't have the engine lowered onto it! I have a few days off work coming up, the plan is to attach up the ancillaries. However I have doubts over the Sierra alternator, might be too big - I'll find out soon enough...

Sunday 15 January 2012

Rolling Chassis

It's been a while since I managed to get any significant time on the car due to a combination of illness, holidays and Christmas. At the start of December I decided it was time to drop the car off the stands before it all got too heavy - this is where I encountered a slight problem! Once the nice shiny wheels (which I have managed to pick up off ebay) were on, the rear wheels would lock; odd I thought so I removed the handbrake, tightened the wheels up and once again everything was jammed up. The same would happen with the brake shoes out (drums on - old or new!) so I put it down to a warped drum back plate. After hours spent on the Internet, I found out I should have used a series of spacers, another thing that would have been apparent had GBS put together a manual or full list of parts on the website. Skip through December whilst I waited for the parts, went on holiday and enjoyed Christmas before getting a cold!

My first free weekend of January I got round to fitting the spacers; once tightened up and the rear brakes rebuilt, I could see the results and funnily enough the rear wheels were able to move as I had expected back at the start of December. After this I had to get on with a dull job, tidying the garage.
The second weekend of January I was lucky to have a helpful hand (Jordan) for the whole of Saturday. With the engine planned to go in on 4th February, I had to finish of all of the little jobs that would be best done without a Pinto in the way. I thought the list was ambitious to complete that day but was pleasantly surprised to find that everything got completed:
  • Repair engine crane
  • Widen steering track rods as my wheels weren't quite right.
  • Reconnect NSF top ball joint as the nut hadn't gone on very well originally.
  • Shorten steering shaft connector bolt
  • Reconnect handbrake following pre-Christmas issues
  • Connect the propshaft
  • Finish attaching up the loom in the engine bay
  • Attach sump
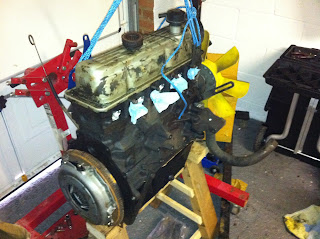
  • Take engine off the the stand ready for new clutch & flywheel
  • Attach clutch & flywheel
No real complications with any of this except that we managed to fit the flywheel before putting on the metal adaptor plate, soon corrected but disappointed about the wasted time!


Part way through the day once all the 'clean' jobs were done I took the opportunity to get some 'rolling chassis' pictures.

On Sunday I finished off the clutch job by replacing clutch bearing in the bellhousing on the gearbox, messy job but one I was recommended to complete. Again no issues with this and the gearbox is one step closer to being attached!