Since the last post I have fitted both side panels, the car apparently now looks like a fancy boat. Both panels have gone on with quite a bit of ease, Sikaflex used in great quantities and a few rivets which I expect will be hidden once the car is complete.

Monday
I took a trip up to GBS as I needed a few more parts. Not sure if this is due to the build order I've gone with but I was kind of hoping the kit I had originally purchased would have lasted me until nearer Christmas before I had to buy lots more parts. Despite Monday being the day they had returned from the Exeter show they were happy to answer a few questions I had about the brake pipes, although I was more or less happy with my original routing they were able to show me a better route that would retain some kind of neatness. I was also given some tips on fitting the required IVA trim in relation to the front suspension. So in addition the advice I obtained and the parts I collected it was a worthwhile journey, be it just over 7 hours of driving!
A tip to anyone planning a Zero build, think about your build order ahead of ordering the kit as it may save you some journeys or delivery costs! Like many other builders have mentioned, GBS need a build guide.
Tuesday
I got started on the car later than I had planned to, probably due to the journey the day before! The first job of the day was to reroute the nearside front brake based on the advice from GBS, this now goes directly to the tunnel and around the passenger footwell instead of going across the engine bay. The offside front follows a similar route, under the steering column towards the tunnel then into the engine bay down towards the flexihose join. Hopefully the picture explains a little better.

 The next job on the list was to start fitting the front wishbones and suspension. This included fitting another set of bushes, I won't go into the detail on these again as it's a dull job and one that requires a certain degree of attention to ensure everything is straight. I decided to start from the bottom up and focus on one side at a time, I'm pleased to say that everything went in place with a certain amount of ease (better than the rear!).
At this stage the steering rack was just placed in the car for storage, fixing this was a job for Thursday. The suspension and wishbones had just been loosely bolted in, I needed to pad out the upper wishbone and upper bracket of the suspension with washers before I could tighten. Again this would a job for Thursday.
Final task for the day was to finish cleaning the front hubs, this job doesn't deserve a photo!
Wednesday
Today was a day off the car, except for a first coat of paint on the hubs and get the front brake calipers in soak ready for cleaning on Thursday.
Thursday
Thursday was always going to be a car day as I had arranged some help from Dave. Before I was joined I managed to get a second coat on the hubs and I cleaned the front calipers. Once the calipers had dried I applied the first coat paint, gone for a matt black which will hopefully look nice against the gunmetal alloys I plan to get.
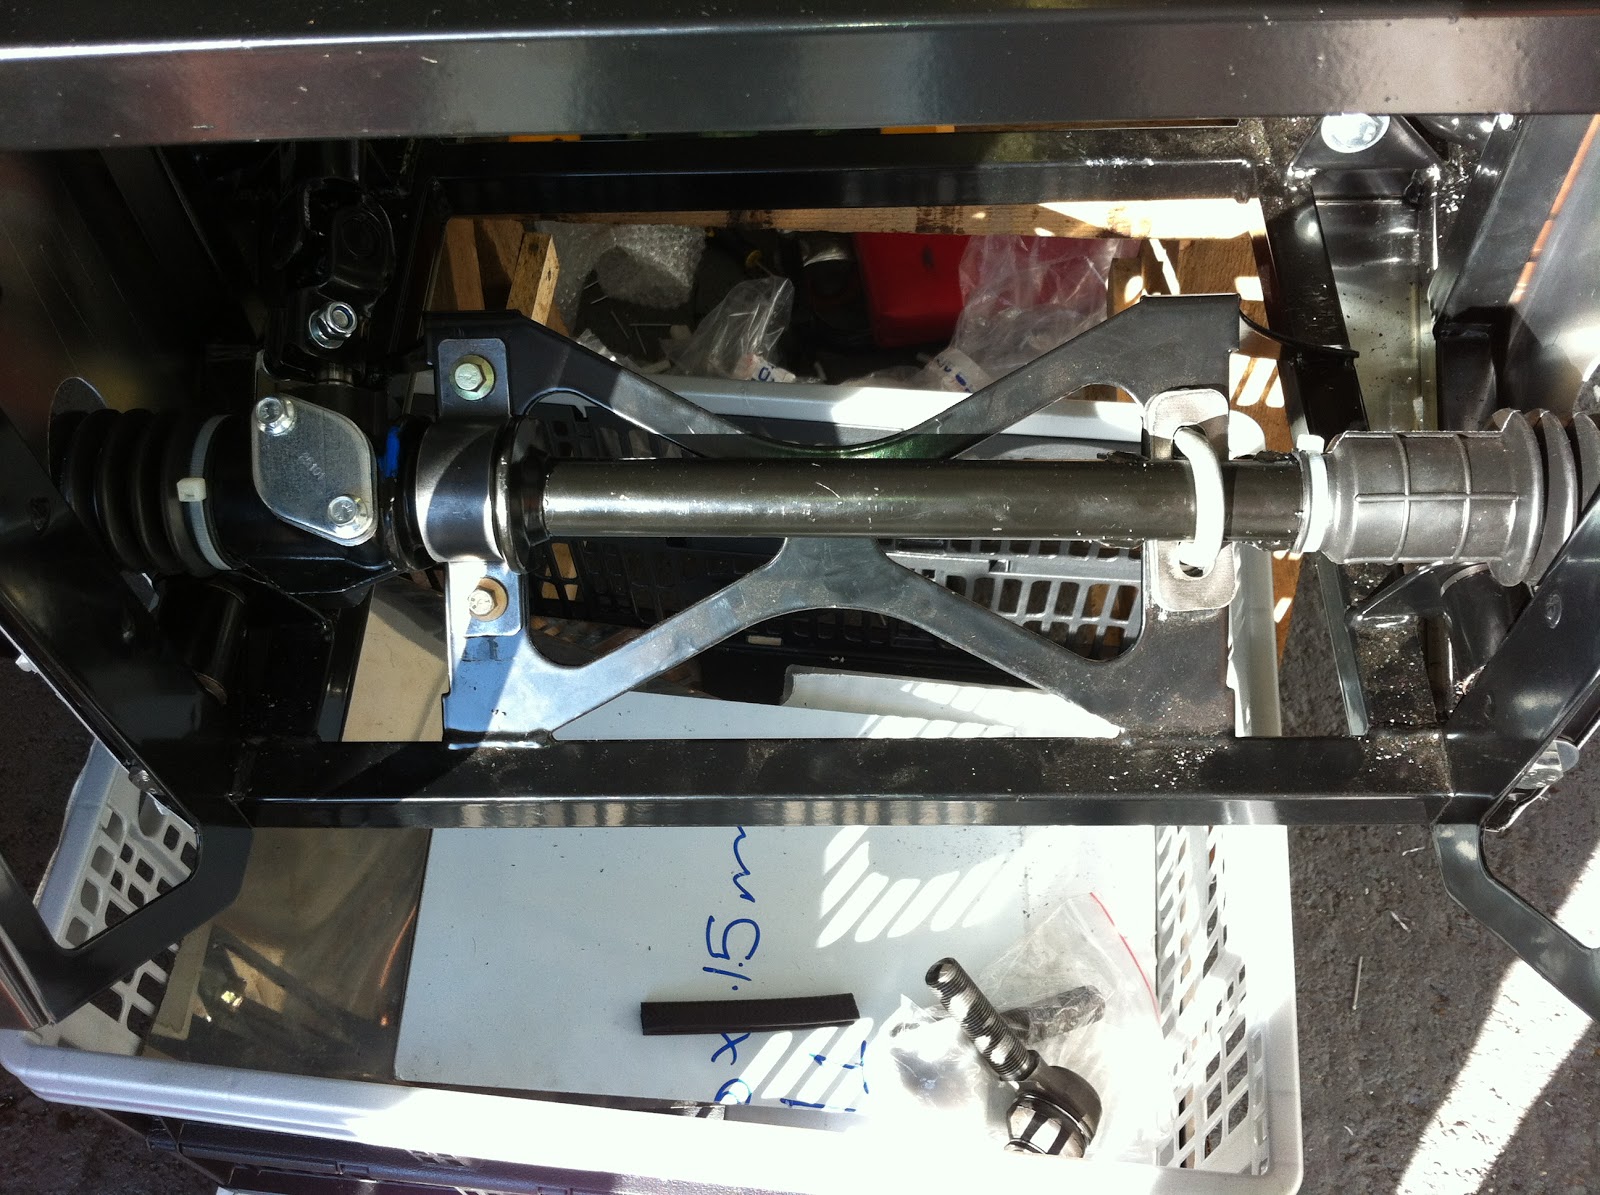
When Dave arrived we set to work on securing the front end, wasn't a huge task but needed to be done right (and tight). After just over an hour everything was tight, I've included a photo of the suspension to show how it was padded out with washers.

We then set about fixing up the steering rack arms with the lovely IVA covers, these are easier to apply when slightly warmed up. As the photo demonstrates, it may be worth me adding some paint to the end sections of the arms but for now they are done. I also couldn't stop myself from adding a hub unit to the set up.

To finish the day off we secured the steering rack in place, on second thoughts this may need to be adjusted slightly but I'm saving that for another day. Once the steering rack was secured we then fitted the steering shaft from GBS.
Friday
I was on my own again so managed to get to work as soon as I was ready for the day. Started the day by finishing off the brake calipers, these would be ready by the end of the day. After getting some advice from Mike and the Internet I thought I'd tackle the rear shoes. It took just under a couple of hours but I finally got the better of the offside rear, I was mega pleased with myself! So much so that I have to include a photo (admittedly with the drum on).

With the first drum brake complete I wanted to continue with the good progress but something potentially quicker. I started on attaching the front upper ball joints, only temporarily though as I need the lock nuts. Not letting this stop me I managed to secure everything and ease in the wing bracket with some copper grease - got loads left so I should use it wherever I need it.

Soon after this I managed to replace the front brake pads, took delivery of my new discs (great timing by Parcelforce) and then fitted the whole brake set up.

I finished up on Friday by refitting the other rear drum. The car is really taking shape now and I felt like I had completed some significant tasks. Only downside from the whole week though - the garage (and car) really does need a clean.

Saturday
I cleaned both the garage and car, needed doing and I can now see the floor of the car again. Forgot how smart it all looked.
I had a decision to make, start on the scuttle or the rear panel? Both tasks had a high chance of going wrong so I had to take things slowly. All I did on Saturday was fold in all the tabs courtesy of the garden table.

All in all a good week, according to my original plan I should be in December now.


